The ultimate Ultimate Hacking Keyboard Review
I have been monitoring the Ultimate Hacking Keyboard since it started its crowd-funding campaign and always wanted to try one. I was very happy when László visited us at the Mechanicon 2018. He gave a super interesting talk and of course brought some UHKs. I tried them and they have been on my bucket list ever since.
A short while ago, I moved into a new apartment. I am very interested in ergonomics for people like me: power users that spend a lot of time working in front of a computer. So this was a good opportunity to level up my home office ergonomics game. A new chair, a standing desk and … a split keyboard.
The UHK is the first split keyboard that I will use for a longer period of time.
Is this Review for you?
When deciding for a keyboard I am really looking for top notch build quality. My daily drivers have mostly been from Leopold or Filco.
I need my keyboard to make me as productive as possible in editing text, be it in the browser, my email application or in my text editor. My whole organization workflow is completely keyboard based and I invested quite a lot of time to get it just the way I want it.
So when a product like UHK advertises deep configurability this means quite something for me. It has to prove that it deserves to be considered in the hours of hours of fine-tuning my setup.
Specs
The UHK shop offers a lot of different options for key switches, layouts, keycap printings and cases colors, 240 variations overall.
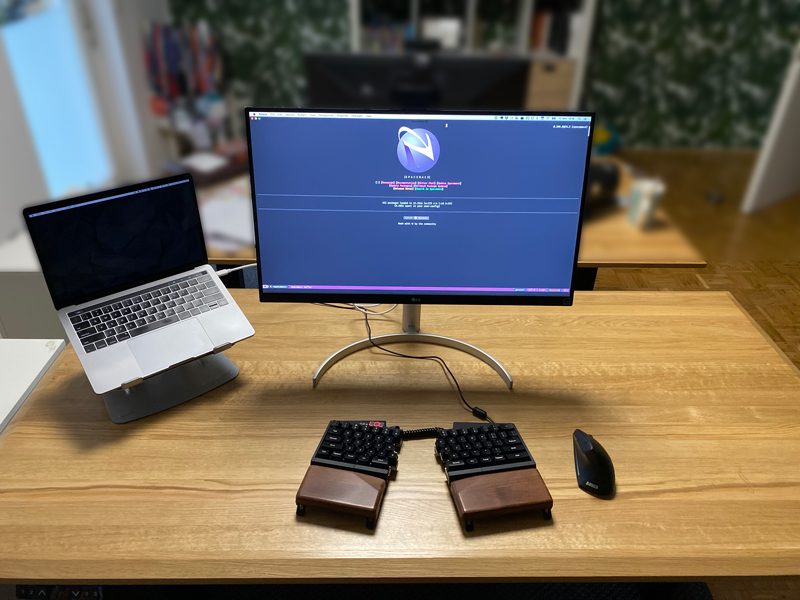
This is my version of the Ultimate Hacking Keyboard:
- Switches: Kailh Brown
- Layout: US-ANSI
- Keycaps: Mac printings
- Case color: Black
- Accessories: Palm rests
Unboxing
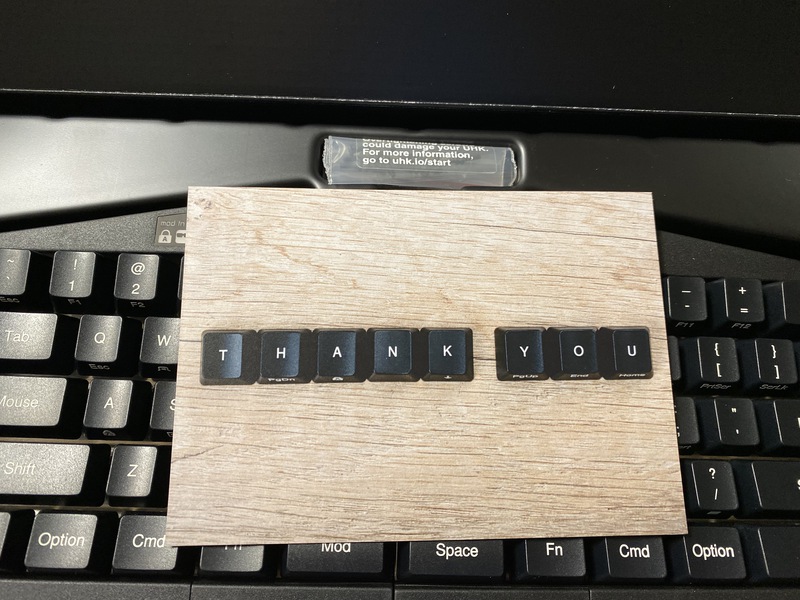
The UHK has a nice packaging and even greets you with a thank you note from the manufacturer, Ultimate Gadget Laboratories.
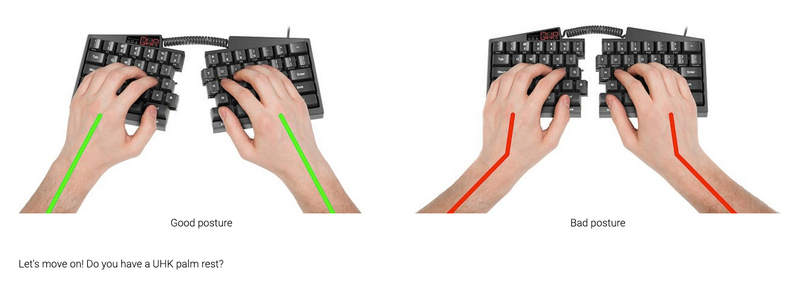
The onboarding tutorial is very good. You get introduced to the keyboard and how you can use the keyboard in a ergonomic way, something I highly appreciate.
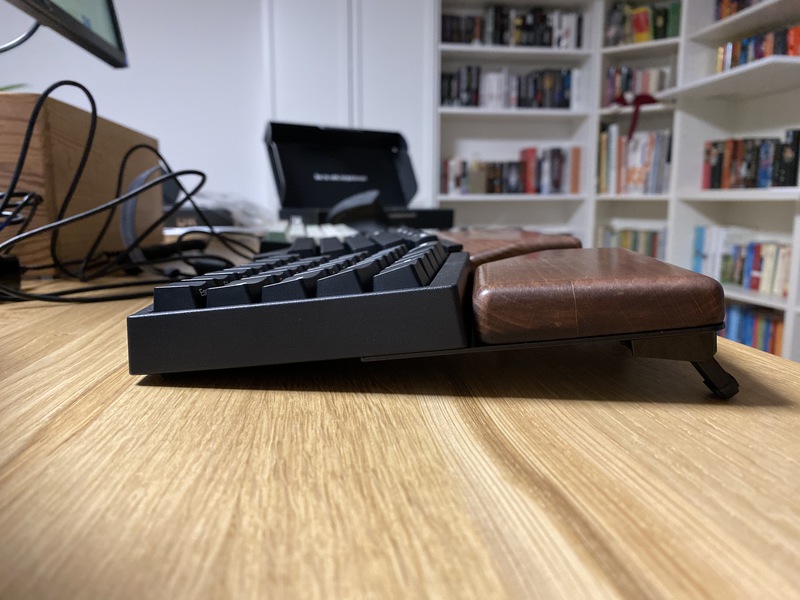
I think there is even room for more: Tenting or Tilting? For now I go with negative tilting, but since you can not have both with the UHK, I would be happy to get even more information to make a decision on this.
The pre-built keyboard case feels nice and solid, all the single parts have a high build quality and get you excited for the next steps.
Assembly
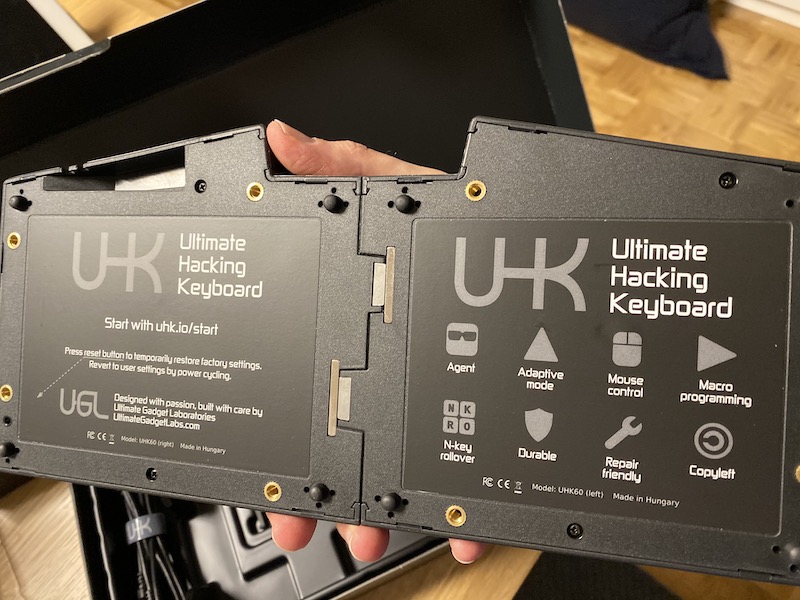
The next step is to assemble the keyboard. The case, plate, switches and keycaps are already in place. But I still have to connect the keyboard to the bases to get my tilting right.
Again, the manual for this is very good and precise.
The alignment of the components before fixation is pretty straigtforward. There is always some knob or cavity that helps to set them properly.
The fixation itself is a bit trickier than anticipated. The UHK tutorial even provides a video how to drive screws into plastic. But to be honest, I didn't get it - it says the screw should click(?), never clicked for me though (pun intended).
The screws are very tiny and I am very proud of myself that I didn't let one slip off my desk. I still appreciate that they threw in three extra screws to prevent possible frustration in case of losing one.
Alright, back to the bases. After some back and forth I managed to screw in the sockets for the feet with no visible gap.
The plastic of the sockets is a bit sensitive and of course I scratch one with the screw driver. If I would want to switch from tilting to tenting the keyboard, I would need to re-assemble the feet/sockets and I wonder how often you can do this without damaging them.
On the other hand, they offer replacement feet at a very fair price, so there is really no risk that you ruin your keyboard by damaging a small part.
Snapping the feet to the sockets is super smooth.
In the end, the whole keyboard looks sturdy and solid and I am very happy and can't wait to try it out.
Side Note: Embrace the setup!
It has been 45 minutes since I opened the package and the keyboard is not even plugged in.
Compared to building your own keyboard the excitement of opening a pre-built keyboard can wear off very fast. I love my daily driver keyboard but the setup process took about 10 minutes and then it was just there.
Due to the extensive onboarding the UHK creates this kind of journey that you usually only get from DIY keyboards.
I personally crave this customization effort. It makes a tool more worthwhile for me when I have the feeling to have a deep dive up front. So this is a lot of fun for me.
After some more information in the tutorial on the default keymaps, I am finally ready to go!
The very first typing experience
First things first, the Ultimate Hacking Keyboard is very comfortable to type on!
I never really used a split keyboard and this one comes very naturally to me. Neither having two parts, nor the tilting of the board affects me.
I takes just a few minutes to get me into my typing flow and I feel comfortable. An important part in this is probably the key layout that is very close to a "normal" keyboard, especially when compared to other split keyboards.
The keyboard has a good weight so you can be sure it can keep a stable position on your desk. Nothing clatters or slips, even with the tenting. It is a very solid keyboard and I like it a lot.
However, it comes apparent that the default keymap will not work for me. So let's look into this.
Layout / Keymap
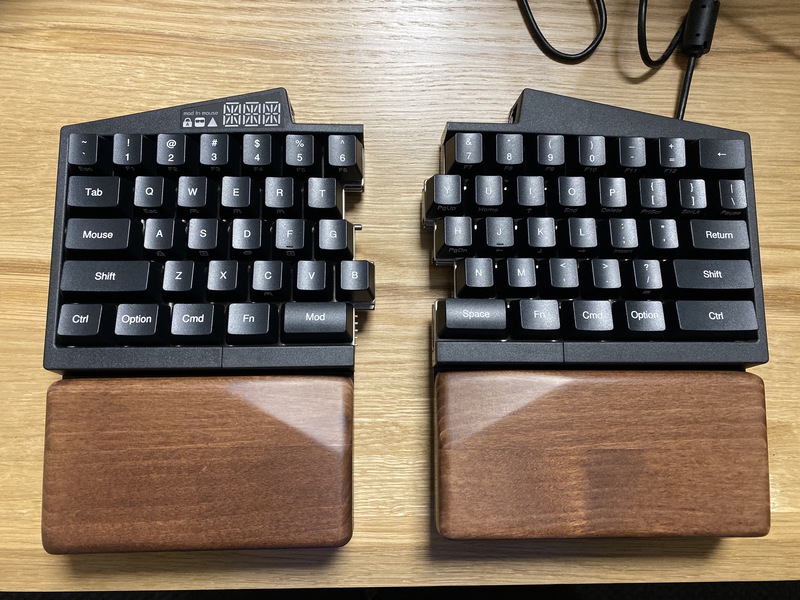
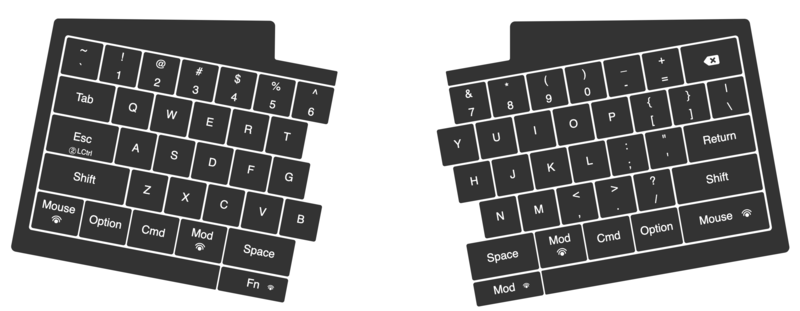
The space bar is split and in the default keymap, there is actually only a Space key on the right, what would be the left part of the Space bar is the Mod key. As a touch typist I use both thumbs to press space, so this is not acceptable for me.
Naturally I am taking these notes in org-mode using VIM-style keybindings. The fact that Esc can only be triggered by Mod+~ causes the most pain at this point.
Outside of my evil Emacs world I use some of the default Mac shortcuts to navigate along text. In my muscle memory, I use the ones that involve arrow keys, like Shift–Command–Right (select the text between the insertion point and the end of the current line) or Option–Shift–Left (extend text selection to the beginning of the current word, then to the beginning of the following word if pressed again).
But on the UHK there are no dedicated arrow keys. You have to press the Mod key to activate the layer that gives you arrow keys. So these slightly uncomfortable three-key-shortcuts become almost impossible four-keys-shortcuts.
As you may have seen on the linked Apple support page, most of this can also be done without the use of arrow keys (in Emacs style, actually). I just have to revert decades of muscle memory, so this will cause some pain over the next days and weeks.
If you look closer at the keyboard, you will also notice that UHK sneaked an additional key between the Cmd keys and the Space bar keys: the Fn key. First I was hesistant to this. But then I realized they took the room for the Fn keys from the Space key which means the position of the Cmd key stays the same compared to other keyboards. After some back and forth I decided to not change the position of the Cmd key. For my muscle memory the physical position of the key seems more important than the strict order of the keys, so in practice it does not bother me that much.
Another important anomaly is that UHK placed the key for the Mouse layer where you can usually find the Caps Lock key. Like a lot of VIM/evil-mode users I mapped Caps Lock to Esc (when pressed alone) and Ctrl (when pressed with other keys), an essential keybinding that I am not willing to lose. So I will need to find another place for the mouse layer key.
The big remapping begins with the UHK Agent
The UHK Agent is easy to use and pretty straightforward. You don't need to set the keyboard in to a special flash mode. The keyboard must be plugged in, you start the Agent, everything is ready.
My first change is to remap Caps Lock from Mouse to Esc/Ctrl. The user interface is very self-explanatory and it just takes a second to save the changes to the keyboard.
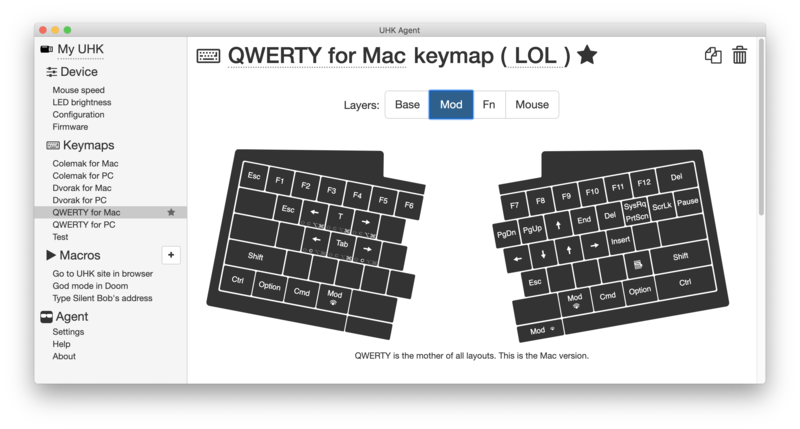
I also mess around with the Mod mode to change the arrow keys in the mode to VIM-style arrow keys (hjkl).
The UHK supports multiple keymaps and you can use shortcuts to switch between QWERY, Dvorak and Colemak. For me as a Mac-only user it is not of special interest. But maybe it is for others, because it is the one software feature that gets the most prominent representation in electronics.
The UHK comes with three small fourteen segment displays built into the case. As far as I could find out they are only capable of showing the current keymap. Otherwise they are rather useless for now.
There are amibitons to make them more interesting, which is good, because I don't need to see that I use Mac QWERTY all the time. I hope for this to arrive sooner than later. Until then it is just a bit weird that you have such a prominent component to show only such a specific detail.
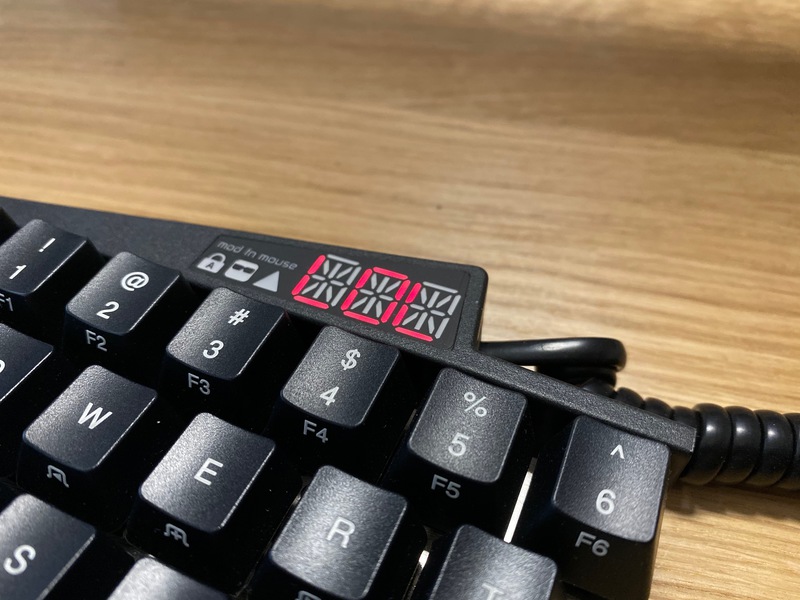
Lifehack: The three letter abbreviation that you can see can be changed in the UHK agent. Another alternative is to just set the brightness of the display to zero to avoid any distraction alltogether.
At the first look, I didn't like the small extra buttons on the bottom of the case. But since I am in severe need for extra keys I start to appreciate them. They feel like a mouse key, yet work pretty good as modifier keys.
The Agent has an auto update which will alert you, when a new version is available. In the future new versions of the UHK Agent will also ship with new firmware versions for the keyboard.
To sum it up: UHK Agent is pretty awesome overall. It did exactly what I wanted it to do.
You can see my modified keymap in the screenshot. Some of the changes invoke immediate pleasure, others probably need some time and learning to work for me.
However, note-taking in evil mode is now a pleasure and I am happy to test the keyboard for an extended period of time, to really find out if it works for me.
Two weeks in…
For two weeks I use the keyboard about 50% of the time and a laptop keyboard for the other 50%. This causes no noticable confusion. Somehow my muscle memory is able to distinguish between the two contexts.
So I remapped the Fn keys between Cmd and Space to Mod and changed the arrow key positions in the mod mode to VIM style. This means, pressing Mod with j and k for up and down now works in every app. I never want to miss this again!
One feature I keep stumbling above: The UHK has the feature to lock modes (like Mouse, Fn, Mod) by double tapping a key that serves as a mode key. This is kind of a two edged sword for me. If you do it intentionally, e.g. with the mouse mode, it is great. When you activate it by accident it still takes me 10-15 seconds to realize what I have done and why the keyboard behaves so strangely.
I would say I have adapted the arrow-less lifestyle about 80%. Just some slight confusion here and then in org-mode specific mini buffers.
The split-factor of the keyboard is pretty nice. I still feel like I don't have to re-learn general touch typing to operate this keyboard. I experimented a bit with the distance of the two keyboard sides and found a setting that is comfortable for me.
I use the keyboard while sitting down and standing at my desk. The keyboard is steady and stays put during usage.
Switches
Due to the Mechanicon, I think I was able to try out a lot of switches over the years. I know what I like but in everyday use I am not able to determine the sublte differences between similar switches.
For the last five years, I used Cherry MX Browns, Cherry MX Blues, Gatereon Greens and Topre 45g switches as my daily drivers.
I chose Kailh Brown for this board, because I wanted something similar to MX Brown. In practice I actually can't determine a difference.
Something I learned over the years is that it is not only about the keycaps themselves, but also how they are fixed on the keyboard. Again, the build quality is very good: No clang or vibrations, just a very sturdy construction.
Keycaps
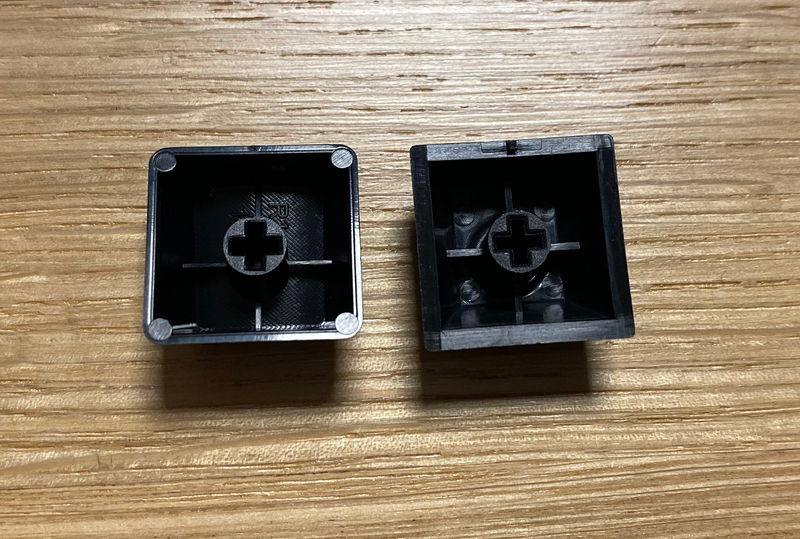
What can you say about the keycaps? They work fine but they don't spark joy in me. A lot of keyboards come with subpar keycaps and unfortunately the UHK is no exception.
Leopold keycaps are my personal standard for off-the-shelf keyboards. And you can see the difference in material and thickness in the photo.
UHK provides you with an extensive guide on the keycaps and layout which is very cool for people that want to use their own keycaps instead. However, since it is a split layout there will be some struggle involved when looking for alternative keycaps (e.g. due to the split space bar).
I get that better keycaps would make the UHK even more pricier and maybe a lot of people are ok with the default keycaps. Due to the exotic layout, I still would wish UHK would provide an upgrade option to get better keycaps.
Update: I got told that UHK actually plans to provide PBT keycaps eventually. I really anticipate it and hope for an upgrade kit!
Open Source / Repairability
For me, this deserves a special shout out! The firmware as well as the electronics design and pretty much anything else is freely available.
Additionally, you can clearly see that the keyboard was built by people that care a lot about real and deep customization.
Not only in the software but also in hardware. From the replacable bridge cable to the online shop for the keyboard feet: it shows me that you don't have to be afraid of playing around with your setup.
Summary
The UHK is a nice, high quality keyboard that also comes at a high price point.
The defaults settings are sane and well-intended, but let's be honest: This keyboard is for people that want to heavily invest into the perfect custom typing experience. I count myself into this target group.
Usually I am happy when the manufacturer just stays out of my way when I start to fumble with their stuff. UHK goes beyond that and supports me in many ways in the customization process: Great onboarding, tooling, repairability and documentation make it easy for me to get my way with this keyboard.
If you are willing to invest a lot of time and effort into customizing your setup the price of the hardware is usually a secondary factor, compared to the time that you will pour into it.
So if you are into ergonomics, if you want to discover the world of split keyboards and you want to customize the sh\*t out of your keyboards, then this is the keyboard for you.
This article was first published November 17th, 2019.
Thank you for reading my article! If you spotted a mistake or you want to provide some feedback, please get in touch with me.
